
There has always been a nostalgic me. Moments that define me and moments that hold me steadfast in adversity have always been there. Some make me hopeful, and some soothe me when things go wrong.
On the other hand, I love Engineering. To some, they may not be able to become what they answered in their 2nd grade exam question, ‘What do you want to become?’, but for me, it was ‘An Engineer’, always. But it was never software that inspired me, but the ones more core, like Mechanical and Robotics. In the world, some tradeoffs need to be made; money matters. To be honest, it was even better to be in software. You get ultimate freedom in creating anything in a virtual world, just using a computer.
So what’s my thing, what has it all? It’s Game Development. It includes scripting, mechanics, physics, and creativity. Apart from all this, a place to recreate some nostalgic moments from your life.
Consider this blog to be my logbook for this journey.
Some decisions to make
- Purpose: It’s simple, engineer moments from my life. Relive them. Make it a visual novel, but one that is playable and closely feels like reliving those moments.
- Tone/Feel: As close to the actual experiences as possible.
- 2D/3D: Working with 2D is feasible considering time. But some levels may be in 3D, once a proper workflow is established, and it may be heavily dependent on online assets.
- Arts Style: Pixel Art
- Tool: Godot Game Engine, considering it to be the best for 2D games. Aseprite for asset design. While my focus is to develop my own assets, making me focus on every pixel and hence indulge more in playing with it as well as making it, I may choose assets initially until I complete the appropriate course for Pixel Art.
My Game Development Lifecycle
The main issue I may face may not be the skills needed, but my motivation. And it’s common in Game Development to have phases of low. To conquer this, I will be dividing my workflow into the following sections.
- Story Design.
- Asset development using Pixel Art.
- Level Design.
- Environment Design.
- Mechanics.
- Modelling and Scripting.
- Getting Inspirations.
I may switch from one to another to bring some variety. It may seem too much to worry about, but it’s necessary.
First Inspirations


Prompting ChatGPT led me to these images. The first one is just perfect. It’s what I want. I get several possibilities with this one. Keep me as a playable or keep something else as playable. Maybe a cat, which jumps over the scene and has a quest. The second image depicts how I want my cut-scenes to be. The third one is closer to my vision of how it can go. Instead of these scenes exactly, I create ones closer to my memories.
Goals for 2025
My goal for the rest of this year is to create a workflow, rather than the game itself. Pixel Art takes time to master, and so does a Game Engine. While I may have done some work in these two aspects, level design, environment design, and mechanics are some aspects I need to perfect first.
So it’s simple.
- Practice Pixel Art, preferably create assets for use in the Game.
- Practice GoDot and GDScripts.
- Understand the design of levels, environments, and mechanics.
- Make one level as close to the actual vision as possible.
- Script stories to base levels on.
- Document the process.
Lets Begin
The first step is getting good at Pixel Art. But first, let me tell you why I want to keep Pixel Art as my theme. Pixel art brings back the fun of gameplay and is easier to make than renders used in games today.
Pixel Art
The first thing I want to focus on is the character. I want the game to be a POV of a cat. I want my character to be an NPC. Why?, because it gives me a way to see myself outside my head, from a different, fresh perspective.
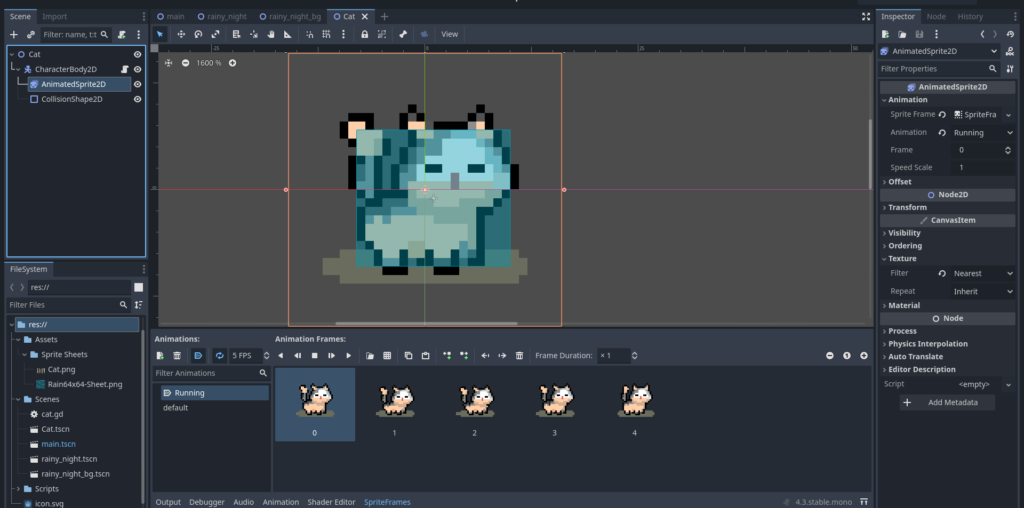
Recently, I purchased Aseprite from Steam, and it’s going to be my workshop. After some online inspiration, I was able to create a cat. Take a look
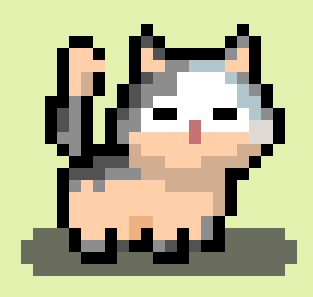
And to animate it, just play with pixels on its legs, tail, and eyes.
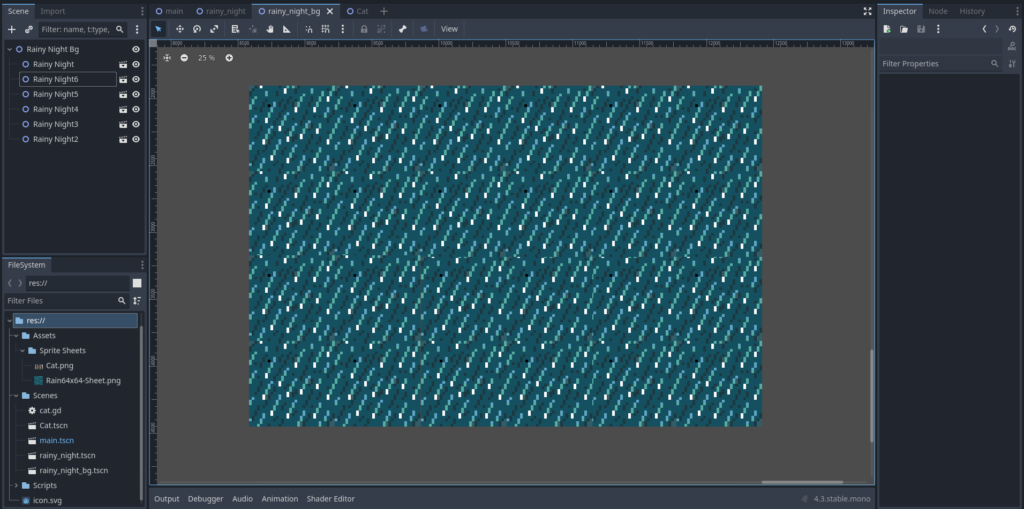
I divided my assets into 3 sections. Characters, Environments, and Objects. For a basic understanding of merging the assets, I made a simple rain background as an environment.
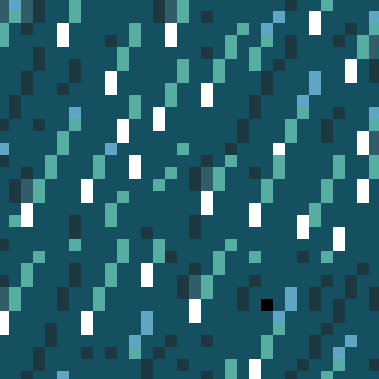
This is a single tile block, proportional to a cat. I made a 64×64 version of it by stitching these blocks together with some minor variations.
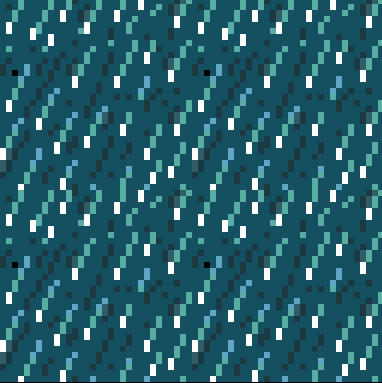
Aseprite has animation features as well. I created another frame with a minor change in pixel positions, and then another, and then another. After getting the 4 frames, I looped them together.
When you export the animation, you can do it in a tileset format. A tileset is just an image with frames of animation stitched together. You can import the image into a Godot sprite sheet and easily divide the frames.
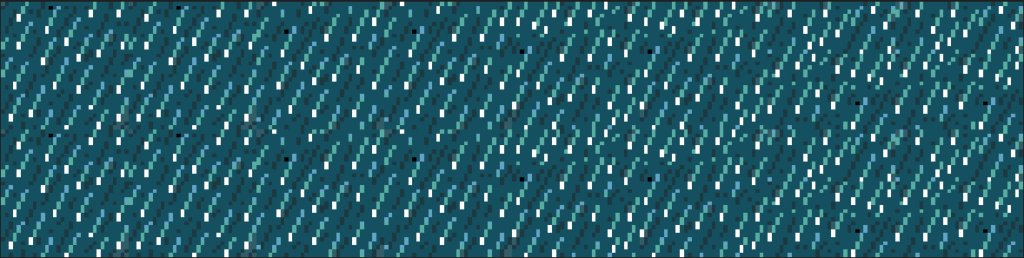
So if I import this into Godot, it will allow me to select the number of divisions for the sprite sheet. For me it’s 4×1. The image is split into 4 frames, which can be animated by the Godot toolset.
I did a similar thing for animating the cat and the frames are

The scene
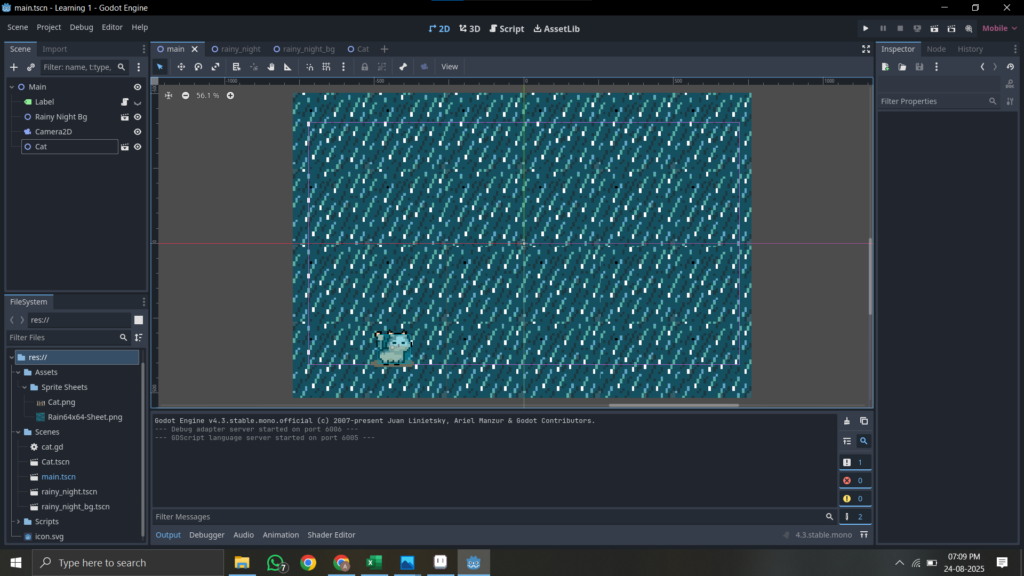
At the top, you can see I have 4 Scenes. The Main scene is the Game Scene. The “Rainy Night BG” is made up of a mesh of “Rainy Night” scenes, which are of type Node2D, having AnimatedSprite2D as their child.

AnimatedSprite2D allows for importing a sprite sheet, splitting it into SpriteFrames, which can be rendered. In the “Rainy Night Bg” scene, I created a mesh of “Rainy Night” Scenes. Since the Rainy Night Scenes are already animated, the “Rainy Night Bg” scene will also be animated.
Similarly, the cat is another Node2D of type CharacterBody2D. Which further has AnimatedSprite2D and CollisionBody2D as children for rendering running animation and for making the character collidable, i.e send a collision signal.
The CharacterBody2D has a script attached as
extends CharacterBody2D
const SPEED = 0.5
const JUMP_VELOCITY = -400.0

func _physics_process(delta: float) -> void:
	velocity.x += SPEED
	move_and_slide()
Yes, it’s bad. But it’s the first time. For now, it’s enough to know the flow.
For the rest of this year, I will be making Pixel Art. Just it. But now I know about the tileset, stitching, animation, etc, logic. Hope it will be easier now.